9.19.2011

Wedding Stuff - Card Box

I've been helping a friend do some last minute things for her very intimate wedding of 30 people, and one of those things includes the card box! I was so happy that she asked me because it just gives me an excuse to try and make something pretty for her to make her happy on her special day.

I love to make things that are simple to do, simple to look at, but with some sort of wow-y factor.  :)  Which in this case I thought was the bow.  I loooove it! 


I wrapped the ribbon around the box and tied a big knot.  One end was short, which was going to end up being one hanging part.  Then I unraveled all the ribbon from the spool and started to make six loops by making a figure eight 3 times.  Holding in the middle, I took a black twist tie and slipped it behind the original knot and around the middle of the "figure eights".  Then I fluffed up the loops and voila!  I cut the excess ribbon and wrapped it around the middle to cover the twist tie.  Don't you the "love"??  ;)
                        

ITEMS USED

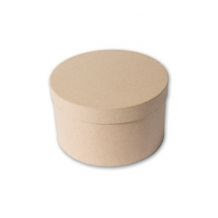
craft box (below)
valspar black spray paint
scrapbook paper
adhesive glitter letters
 ribbon
exacto knife 


I spray painted the lid black.  EASY.  Then I taped three scrapbook paper sheets together at the back, where the pattern matched, and then glued it also.  So when I wrapped it around the box, it was seamless!  This was a much cheaper option than wrapping paper @ Michaels; cost me $0.60 vs $5.00 for the damask wrapping paper.


I cut a hole in the top of the box to fit the cards.  Then I cut some satin ribbon to line the hole so that you can't see the yucky edges.

I glued the two sides on last.  I quickly just touched both ends of the cut ribbon to the burner on the stove so it would seal and make it look cleaner when glued down without any chance for frayed edges showing.

Then I stuck the letters on, and done!


Having a wedding anytime soon??


9.13.2011

Do you have cats??

catversushuman.blogspot.com

If you have cats, which I'm starting to think a lot of the crafters out there do, you need to check out the blog Cat versus Human.  It's a comic blog, the author posts her comics a couple times a week which revolve mostly around the ownership of cats.  I stumbled on it yesterday and I could not stop laughing my a*s off!  ;)  pardon my english.  hee.  I read through the entire blog in one sitting and discovered the reason it's funny.... is because it's true.  :)  I love it, check it out!  

It's funny how even when I look at this and laugh, and know it's true, I still can say I looove my kitty.  She can be a real b*tch sometimes, but I'm pretty sure that only endears me to her even more, and that's all part of why I love her.    Dog owners just can't understand!

9.12.2011

Mod Podge TV Tray


As I said I would, I've refinished another boring wood TV Tray.  Yay for me!  :)  I've been recovering from a weird summer "cold" for the last week, which still has not completely gone away, so I mostly stayed in this weekend and used it to start and finish this table off!  I knew I wanted to do the next tray with Mod Podge and some type of pretty paper, and as I leafed through the pieces of scrapbook paper I've collected over the years, I KNEW, this paper was the one I wanted. 

is it not the sweetest??!

I really wanted to paint the table in white, because the paper just seems so delicate that it deserved to have a delicate backdrop.  However, the paper looks very vintage-y, so I thought the black would make it stand out and also kind of make the paper look like a film reel or something because of the black border on top and bottom.  Anyway, that was my logic.  Was it a good choice, yay/nay??

The project itself was super simple, of course, and that's the way I like it!  I only needed 6 items to help me from start to finish!  See below!

darnit, i forgot to mention the brayer, i also used a brayer!

FIRST I disassembled the table with my trusty screwdriver.  Then I sanded the tabletop and legs a little bit with a 180 grit paper, and wiped it down.   SECOND I sprayed two coats of flat black Valspar paint on the entire piece; except for the bottom side of the table because nobody will see that and I didn't want to waste precious spray paint!   THIRD Once that was dry, I took my beeeautiful scrapbook paper and measured it against the tabletop.  I had to cut one of the sheets with my exacto knife to fit perfectly to the edge.  Then, the tricky scary part.  It's the first time I've used Mod Podge in this type of application so, as usual, I was very nervous and wanted to delay this part as long as I could.  I stared at it for maybe twenty minutes, then I just poured my Mod Podge into a yogurt container and got to podgin'!  :)  FOURTH I slathered the Mod Podge onto the tabletop with a foam brush, then quickly onto the back of my first sheet of paper.  I laid it on, and used the brayer to smooth out the paper and squeeze out the excess glue that was underneath.  Then I did the same with the second piece of paper (side note: I am a messy crafter, so as I left my second piece of paper NEAR the area I was Mod Podging the first one, SOME HOW some WAY a little drop of glue got onto the paper and when I wen to grab it it RIPPED a couple of tiny patches away from the picture. I was horrified but still had to work quickly and move on.  Lesson learned: be neater and more organized.)  Anyway, then I quickly wiped away the excess glue globs from the top and sides with a damp wash cloth and I let it sit for 20 minutes.  FIFTH After it was dry, I started the sealing process by painting on 5 successive coats of the Mod Podge, directly on top, twenty minutes apart.  Make sure when you are doing these coats that no air bubbles show up, or they will dry as bubbles!  (okay okay, so I had ONE minuscule bubble in mine, betcha can't see it in the picture though!  hee.)   Then I was done!  After the last coat was dry I reassembled and voila!  A new, pretty, vintage, LOVE-ly table.  ;)


The total cost, not including TV tray because I already have TONS of those, was $4.50 (for black spray paint) + $0.20 x 2 (for paper) + $7.00 / 3 (for Mod Podge b/c I still have 2/3 left) = $7.23.


LINKED UP TO:


9.07.2011

PROGRESS...


O.M.G.  I. am. pooped.  As you can see, further to these past posts (here & then here), I am nearly finished the painting of the table.  I WAS going to skip the "San Francisco" part of the sign at the bottom, but that just didn't sit well with me, so I decided I just can't do that.  To make my life easier though I am definitely going to ignore the script in the original sign and try to find a stencil to paint it on with.  I have officially spent about 25 hours of my life painting this sign on.  I certainly hope it will be worth it.

I must say, the one thing I hated about this project was, having to kill spiders.  You would not BELIEVE how many DADDY LONG LEGS, to be exact, are just sitting on the baseboards in my basement!  GROSS.  The first time I went back to painting after my little sabbatical I had to kill FOUR of them just to start painting; they were propped up against the drop cloth and the table front.  Then, WHILE I was painting, one started walking across the table!  I get goose bumps just thinking about it!

Anyway, next step is to finish the lettering and STAIN, then paint/distress the legs.  I got some wonderful advice from Korrie @ Red Hen Home so the prospect of staining is causing me a little less anxiety now.  I will post the project again when it is complete!  Wish me luck!


Pin It

9.04.2011

Numeric TV Tray

yipee!  it's done!

Well I've done it!  Remember the TV tray I had been working on weeks back, well, I've finally completed it!  Well okay, I have to do a coat or two of poly, (hee) but that's easy right?!! ;)  I'm delaying it because I'm scared.  I've never used it before and I don't want to screw up!!  This seems to be a running theme with all my projects... I can't finish them because each step further leads to yet another chance to muck something up!  I am going to do it, however, I've actually been waiting for a 50% off coupon @ Michael's, which I knew would come this weekend, so that I could buy a can for cheaper.  tee hee.

Anyway, here is, essentially, the finished product!   Looks SOOO much better than that drab, cheap, wood.  Do you agree???


It was SUPER easy to sand, and really easy to paint.  I just did a quick sanding with 180 grit paper, and then painted one layer of white with Behr Interior Paint & Primer in one.  The numbers I painted with regular craft paint in metallic from Michaels.  I used green and blue for either side of the spectrum, then diluted them down with white craft paint to get the gradient effect (as seen in the original post).  Then I painted again with two more layers of white.  The only laborious part was the stenciling because I did not have a stencil.  BUT, if you do have one, you can make something like this in a JIFFY!!

I know a lot of people have these in their homes, it seems to be a necessary evil because they're so handy yet so ugly.  

So, why not spiff it up a bit?!!
ugly, boring, hideous, eye sore.  any other adjectives you want to add??

care for a read?


doesn't look too shabby when it's put away either!  :)
 Let me know what you think of it!!

I'm definitely going to refinish more with different styles in the weeks to come!

Show me a pic if you do try it for yourself!  

:)


The DIY Show Offhttp://linesacrossmyface.blogspot.com/search/label/the%20Cure%20for%20the%20Common%20Monday

9.03.2011

Geung Cheung

one word: YUM

Alright, so let me preface this post by saying, I'm not Asian.  :)  hee.  However, living in Toronto allows one to be exposed to many, many cultures aside from one's own, which is awesome.  I am so privileged to live somewhere that has a lot of diversity.  I'll never forget the time in Jamaica when we stopped at a little food/souvenir shop on our way back to the airport.  We had went up to the counter and saw some beef patties, some chips, not much else from what I could remember.  Then another tourist we did not know was inspecting the patties and looked confused.  She asked us what they were and I was just dumbfounded by the question.  I could not believe she didn't know what a simple Jamaican Beef Patty was and wondered where on earth she could be from.  I guess that's my own ignorance that I assumed she should know what it was, but from that day on I gained more appreciation for what I have and have access to. 

Now, coming back from that tangent I always go off on, I'm not Asian, but I'm basically Asian by association.  hahahaha.  I laugh mostly because I'm just imagining what Ang and Meowie are thinking right now (2 out of my 3 followers). ;)   Anyway, I eat lots of Chinese food, but I have no clue in the world how to replicate a single dish.  However, there is ONE sauce/dip/condiment that I have learned to make (somewhat), and that my tummy absolutely ADORES , and that is GEUNG CHEUNG.  I think it literally means Ginger Scallion, which are its two main ingredients.  Confirmation, anyone??!  It has four main ingredients in total, the two previously mentioned, and soy sauce and oil.  You can also add a drop of sesame seed oil at the end if you like.

So you would make the sauce, and then basically eat it with poached chicken, or you can make some yummy crab and eat it with that, and RICE.  MMmmmMmmMmmmmmm.  SO GOOD.


MY BASTARDIZED VERSION OF GEUNG CHEUNG

Step 1, 1, 1:  We can have lots of fun (NKOTB)

Step 2, 2, 2:  Just kidding, I won't continue, I promise!  Here we go, very finely mince lots and lots of ginger.  I used one medium piece.  Then chop up some scallions; you can chop them roughly.  Combine the two in a heat resistant bowl.


Step 3:  Heat some vegetable oil in a pan; use enough oil to essentially cover the ingredients in your bowl.  Put on high heat, wait until you can see the little creases that begin to form in the oil (as somewhat seen in pic below).  You want to make sure the oil is HOT.  


Step 4:  Once oil is sufficiently blazing hot, take off of stove and pour directly onto your ginger and scallions.  

Step 5:  Add soy sauce and sesame seed oil as desired.
final result, without soy sauce added yet

Step 6:  Done!!  Or, as my Chinese friends would say, Done!  ;)  hee hee. (you know you love me)

my lunch on an ugly corelle plate.  i can't take pro photos for beans.  sigh


Try it and Enjoy!!  You won't be disappointed! 


Pin It


9.01.2011

depression is real


It's no secret, anymore, that I'm prone to depression.  Not a lot of people know it, especially people that don't know me well.  Actually even people that know me well barely know it.  That's somewhat the nature of the beast though, I think.  I've come to observe and believe that a lot of the seemingly "happiest" people in life, are the most unhappy.  I'm not blanketing everyone who is "happy" with that statement, but I have often found it to be true from the people I've known in my life, from myself, and from stories I've read and heard about.

The catalyst for my post today was my previous post yesterday.  I had been searching my old bookmarks to look for the excellent sites I had found years ago which led me to start my journey of oil cleansing.  I clicked on one of the sites called Prissy Green.  Today I went back to read more posts on the very informative and creative site, when I found out that the blog author had committed suicide over a year and a half ago.  The blogger's name was Karissa Gindling.  

Even though I did not know her, I couldn't help but tear up.  Judging from the comments left, I doubt very many people in her life really knew she was depressed.  She seemed like a happy, content, ambitious, capable, smiley girl with nothing that would make her want to commit such an offense against herself.  As someone who is afflicted with bouts of depression, I feel so much for her and what she might have been going through.  The reason I bring it up now is because I want to bring it to the light of people who have not been there, and who can't understand, even if they try.  I had heard other heartbreaking stories in the past, one of Marie Osmond's son, another of Anderson Cooper's brother who jumped out of the window of his condo building in front of his mother who begged him not to.  It doesn't matter if you're rich or poor, when you are in the depths of depression there is no rationality, no logic, no light at the end of the tunnel, no truth but the voice inside your own head. 

I now realize that diseases like depression, or drug addiction, or alcoholism, or gambling addiction, really cannot be understood by anyone who isn't afflicted by it.  Although I have feelings of depression I have found myself, in the past, unmoved by those with drug addiction; feeling that it should be easy for them to stop, mostly because I have no desire for drugs myself and don't have any capability of really understanding why they do.

My point is this, even if you don't understand, even if you can't put yourself in that person's shoes, the most important thing is being there, without judgment.  Depression is a real disease, a mental disease.  Like a cancer, even if it seems to have gone away, it can always creep back.  Recognizing depression can also be very difficult, because it can express itself in different ways.  I think it's important to take notice of the people you care about.  If you hear someone make out of place comments about feeling alone or suicidal comments, don't take it lightly.  Probe further if possible.  Just try to be there.  I believe it's better to be over concerned than under.  Take notice.  Maybe you can be someone's light at the end of the tunnel.                     

If you are depressed, tell someone you are.  Or see a doctor as soon as possible.

Related Posts Plugin for WordPress, Blogger...